Interactive theorem proving with IntelliJ Arend
This tutorial has two goals:
- Show how to prove a simple theorem in Arend.
- Demonstrate the features of IntelliJ Arend that speed-up theorem proving, make it more convenient and truly interactive.
Before getting started, make sure you have installed IntelliJ Arend and created a new project. Here we use Arend 1.7 and IntelliJ Arend 2021.3.2.
As a working example, we are going to prove the following property of natural numbers:
\open Nat (+)

\func cancel-right {n m : Nat} (k : Nat) (p : n + k = m + k) : n = m => {?}
We start by pattern matching on k:
As we type, we notice that the IDE provides completion for keywords like \elim. The completion is also available for definitions even if they are not imported to the current file. We will see this later.
Another feature of the IDE we see here is background typechecking: as we finish typing, IDE typechecks the definition and shows that it has an error. This process is incremental; only the last modified definition is re-typechecked.
The error tells us that we need to consider 0 and suc n patterns when matching Nat. Instead of typing them manually, we can ask the IDE to generate the code:
This is called a quick-fix. Quick-fixes are available for errors when it is possible to generate some code that fixes the error.
Let’s continue with the proof by examining the first goal:
The Arend Errors view shows us all the information about the goal. We can control the presentation using Goals pretty printer options.
We need to prove that n = m, and when k is 0 we have exactly that proof in the context, it is p. We fill the goal with p and move to the second one:
This time p is different. We notice that if we drop suc from both sides of the equation, we will get our induction hypothesis. And having that we can finish the proof by calling cancel-right recursively. Let’s do that step by step:
To drop suc we will use the pmap function from the standard library:
There are two things to notice here. Firstly, we Pin the goal view before typing pmap. When we remove a goal from the file, the goal view is cleared. To prevent this, we use Pin which will hold the contents of the view until we press it again.
Secondly, in spite of pmap being defined in some external module, it is suggested by the completion. And when we select the completion item, IDE inserts a corresponding import in our file. This feature is called “Auto Import”, and thanks to it we do not need to memorize import paths or ever type them manually.
Let’s examine the pmap function in a bit more detail:
The IDE provides a number of tools that help to learn more about declarations like pmap:
- Quick Documentation pop-up shows various information about the function, for example, its signature.
- Navigate | Declaration or Usage brings us to the place where the function is declared. Here we can check out how exactly pmap is defined.
- External Libraries in the Project View allows us to browse the standard library. Aside from Paths.ard that contains pmap we see a lot of modules that could be useful for our proofs.
- Find usages shows all the places where the function is used. We see that pmap is used quite extensively in the standard library.
The signature of pmap tells us that we need to pass 2 explicit arguments: a function that will be applied to both sides of the equation, and the equation itself.
The function we need to provide should basically subtract 1 from a natural number. When the number is 0, the function will have no effect:
As the first step, we create a lambda function. Again, IDE helps us here by providing the Replace with constructor context action. This action is suggested because our goal has the type Nat -> Nat and the IDE knows the only constructor for such a type is lambda. Then, we use the quick-fix to generate patterns that we have already seen before. And this actually finishes our proof!
Before we finish, let’s do a bit of clean-up. To give auto generated variables better names, we can use the Rename feature:
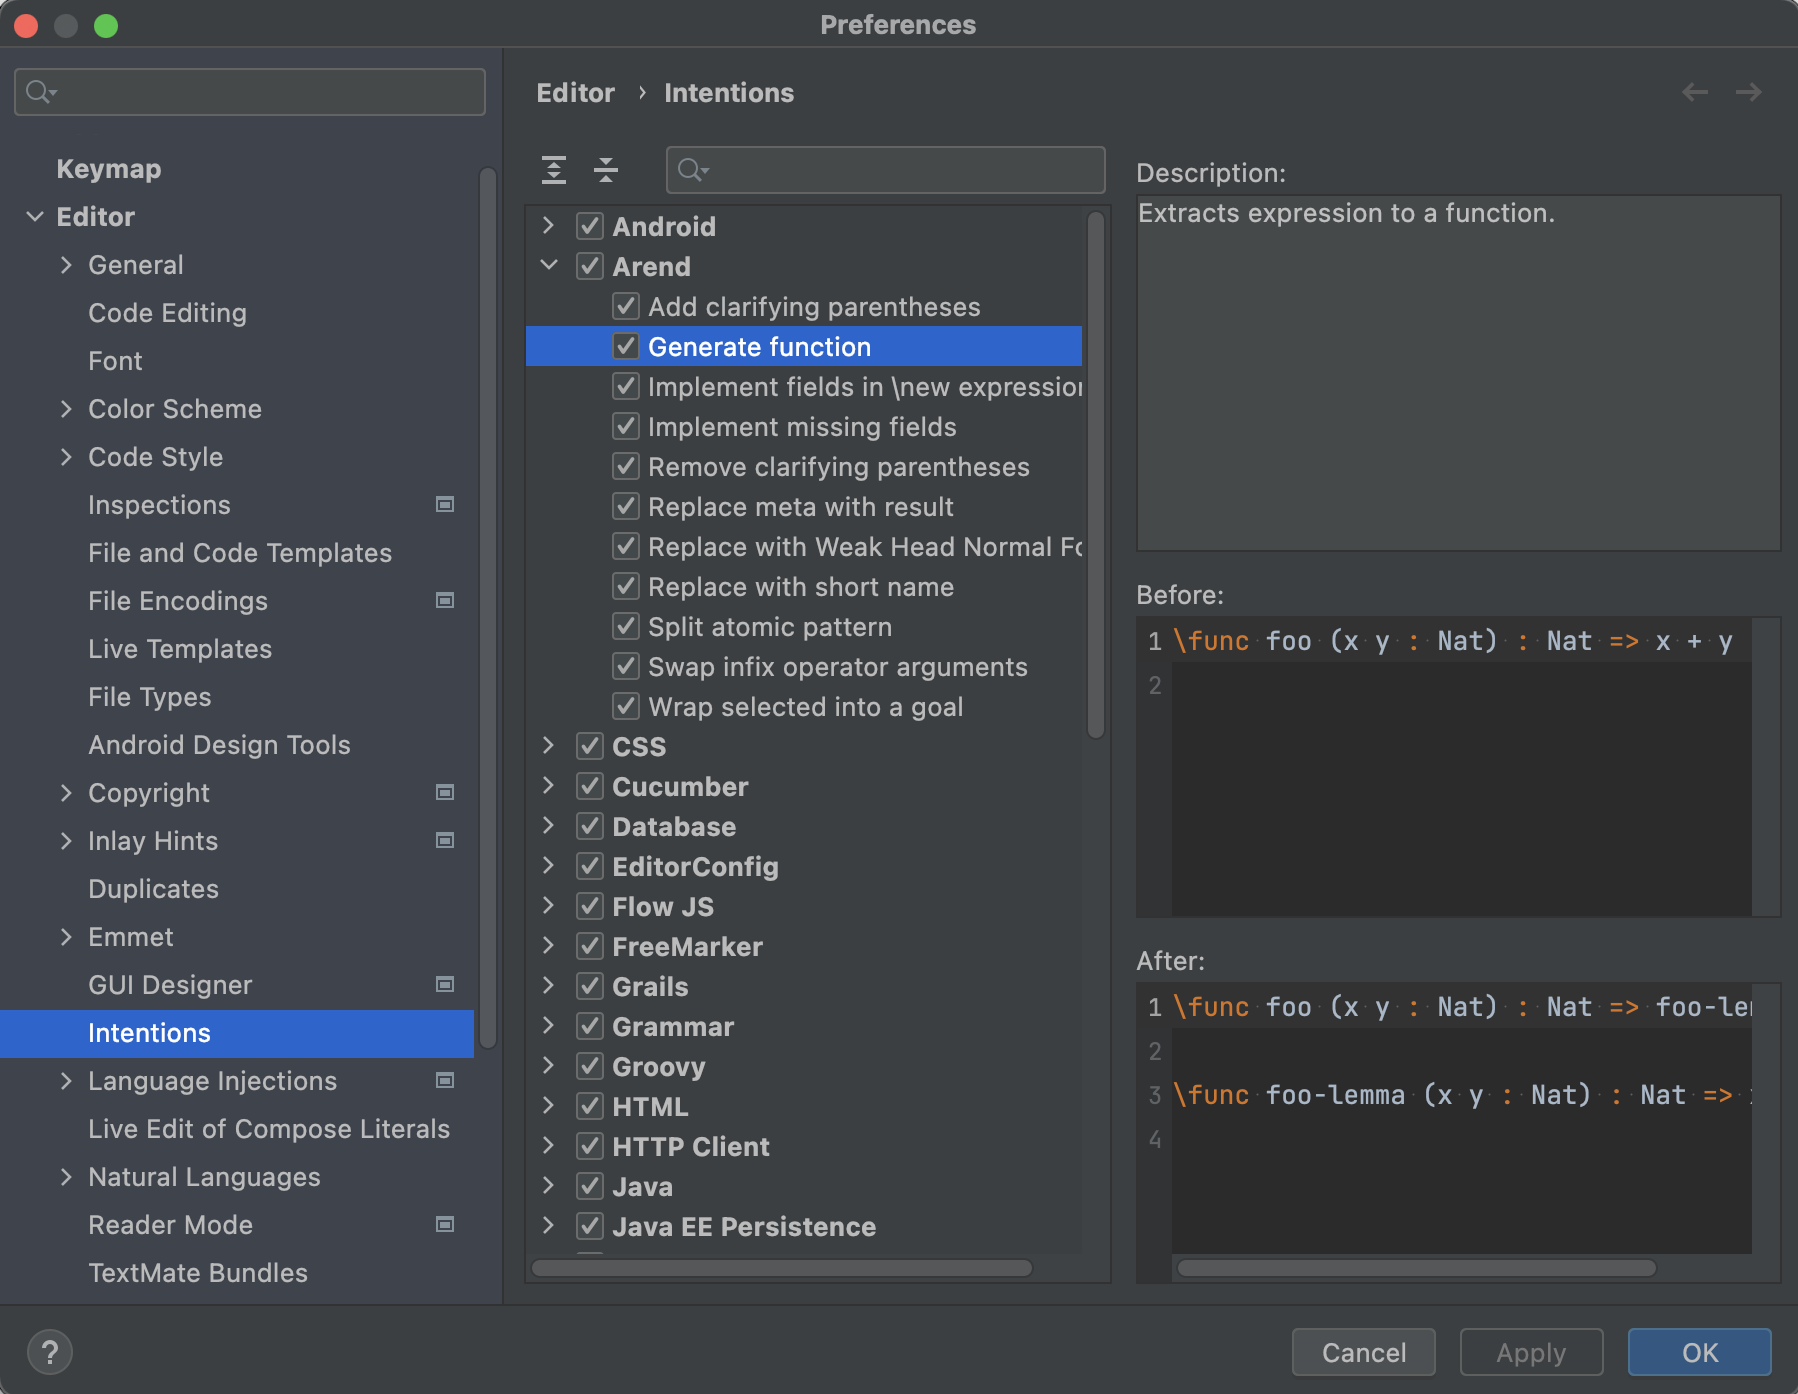
The function that subtracts 1 from a natural number could be useful on its own. We can extract it to a separate declaration using the Extract expression to function context action:
To learn more about context actions like Extract expression to function, check out Preferences | Editor | Intentions | Arend:

This brings us to the end of the tutorial. To learn more, please visit the IntelliJ Arend Features page.